
🌀 How to Build a Kashaka Practice Routine
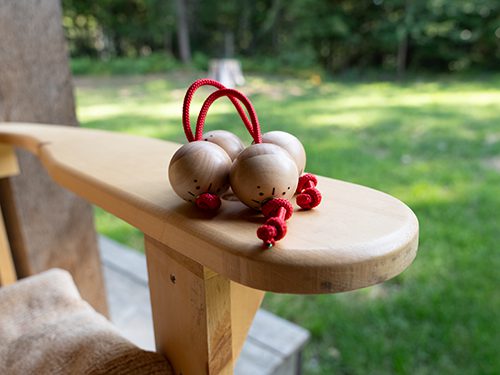
Learning to play the Kashakas — those joyful, percussive shaker balls connected by a cord — is incredibly fun… and very humbling. We have yet to come across any new player who has been able to get the technique of playing on the first go. It takes time, and patience, and a great sense of humor to get past the “I suck” stage! Expect the balls to go flying. Expect that you might hit yourself. Expect that your non-dominant hand is going to have some difficulty catching up. And expect that you WILL get this, even if it takes a month or two of daily practice. It will feel SO good when you do get it.
Here’s a simple, beginner-friendly guide to help you set up a practice routine that builds confidence, coordination, and rhythm — one small step at a time.
✨ Step 1: Master the Top Catch
Start by tossing the top ball over your hand and catching it with your index/pointer finger. Over and over. Don’t worry about speed or flow — just aim for control and consistency. Let your wrist stay loose, and your fingers spread apart.
Do this with both hands — try hands together and then one at a time.
✨ Step 2: Introduce the Bottom Catch
Once your top catch feels smooth, start incorporating the bottom ball. This is where the real fun (and challenge) begins. The goal is to get the rhythm: click the balls together at the top, then swing the ball around by flicking the rope with your thumb to click the balls together at the bottom as you catch it with the 4th and 5th fingers. Keep the motion relaxed and circular.
Think about making space for the ball in your hand rather than trying to grab it. Spread your fingers wide and keep them loose.When you get it, pay attention to what position your arms and hands were in order to train your brain to repeat that movement.
✨ Step 3: Get the Other Hand Involved
Don’t rush to play both hands at once. Instead, give your non-dominant hand its own space to learn. Let your dominant hand teach your non-dominant hand the movement and practice solo with that hand until it catches up in strength and control.
✨ Step 4: Play Along With a Song
Once you’re getting consistent clicks and catches, it’s time to make it musical. Pick a song with a clear rhythm at a tempo that is similar to your current level of play.
This is when Kashaka playing really starts to feel like dancing with your hands. You can add in the rythmic shake and have control over when the balls make contact for the click. Let the fun begin!!!
🧠 Bonus Tips for Learning
-
Start slow — speed will come with muscle memory.
-
Practice in short sessions to avoid hand fatigue.
-
Use a mirror or camera to see your form.
-
Make it fun: play outdoors, to your favorite songs, or while taking a break from the computer.
-
Remind yourself: anything worth learning takes time. Give yourself that time.
🎶 Remember…
You’re not just learning a rhythm. You’re creating new neural pathways, building confidence, and letting your body speak in sound.
Wherever you’re at in your Kashaka journey — beginner, dabbler, or devoted player — what matters most is that you’re showing up and shaking it out. 💛
